Fix for Item can’t be moved to Trash because…

Deleting files on a Mac is one if the simplest tasks, or one would assume. Ever so often the error “Item can’t be moved to Trash because item can’t be deleted” shows up when attempting to move a file to the trash can.
The reason behind the message is that the file to be deleted is in use and the holding application won’t release it for moving. The easiest fix is to find out which application is holding the files locked ...
Mount SSH Folder on a Mac with OSXFuse & SSHFS

You may already know how to access shared files on a PC over your home network from a Mac. What about accessing a share on your file server on the internet via SSH? Here we’re going to mount an SSH folder on a Mac with OSXFuse and SSHFS.
Google engineers released a software package that enables Mac OS X to mount remote file systems using a variety of methods, including SSH. This software, called OSXFuse lets you drag and drop files to an SSH-connected folder right in ...
iOS Bluetooth Problems & Fixes

iOS 7 has been wildly adopted by now and most users like it. Some snags have been present at launch, but most were ironed out with couple of subsequent service releases. One area that still seems to bug users is with Bluetooth connections.
There are a variety of issues, most of them related to connecting to external devices, and even more solutions that are fixes or at least workarounds. So let’s start tackle these iOS bluetooth problems once and for all.
Steps ...OS X Mavericks clean install from USB
Installing and setting up OS X Mavericks is a breeze, especially since Apple moved OS upgrades from manual downloads to the app store. Couple of clicks and a coffee break, voila.
But what if you like to format your Mac’s hard drive and start with a fresh install, or if you have multiple Macs to upgrade and just don’t want to download the big install file for every single one of them?
It’s easier that you might think, if you have a ...
Adjust Your Apple Cinema Display Brightness
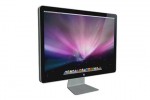
The very first time I was looking to adjust the brightness of my Cinema Display, I was puzzled that it wouldn’t work using the brightness buttons on my keyboard. Somehow I knew I was missing something, as the keyboard of my MacBook Air only has one pair of buttons, and how would it know which display I wanted to adjust, the Air’s or the display’s.
But what about the external keyboard? Shouldn’t that be able to brighten the external monitor and ...
Reset Apple Wireless Keyboard Pairing
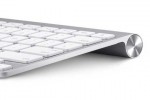
The Apple Wireless Keyboard pairing problems of it’s Bluetooth version are all too common, yet there are no easy to find instructions on Apples website, at least I couldn’t find any. If you’re like me and countless fellow Mac users that needed to reset their Apple wireless keyboard, just to run into a lengthy process of research and frustration, well then you know what I’m talking about.
It’s completely inexcusable that such a simple, yet highly demanded task is poorly documented by Apple. After ...
Best Free Beat Making Software
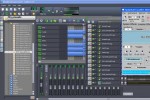
Beat Making can be a great way to earn money and build a career in the music industry. Up to now, you only had a couple of options when it came to selecting a beat maker.
The first was to pay a high price for high priced high end equipment. The other option was to get affordable software that you could afford, but made beats that sounded like crap.
Here you find all types of software for making hip hop beats with ...
Top Firefox Extensions For Web Developers

With new releases of Firefox coming out every few weeks, we thought it’s time for a fresh list of most powerful, top Firefox extensions for web developers. Even though couple of our mentions are not yet compatible with this latest release, we’re convinced they’ll be available in no time.
While the latest releases also include some HTML 5 enhancements, we like to see some new extensions to help developers with canvas, forms, local storage and other new features in the future.
In ...
Install ffmpeg on Mac Snow Leopard

Ffmpeg is the de-facto open source standard for encoding audio and video. Especially with the arrival of html5 which uses codecs like Ogg, Theora, Vorbis, h264, webm among others, and the increasing popularity of devices from Apple, such as iPod, iPad and the iPhone, all of which require a different standard from flv, the version so widely in use by Adobe Flash.
Another positive aspect is that ffmpeg has a much revived developer group, posed to enhance the application on a ...
Create Your Own Folders On The iPad
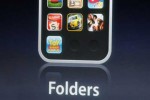
Creating our own folders to organize files has always been on top of the wish list for the iPad. With iOS 4.2 we finally have the capability of creating desktop folders to store applications, photos, videos or any other content.
In addition, creating folders on the iPad is an easy way to limit the number of screens we have to scroll through when searching for a file or an application.
Create folders on iPad and iPhoneCreate a ...