Category Archives: Ubuntu

Linux jobs get more demand

Linux logoLinux Foundation director Jim Zemlin, has some advise for Linux world professionals. He was as of late quoted saying, “Linux’s increasing use across industries is building high demand for Linux jobs despite national unemployment stats.

Linux.com reaches millions of Linux professionals from all over the world. By providing a Jobs Board feature on the popular community site, we can bring together employers, recruiters and job seekers to lay the intellectual foundation for tomorrow’s IT industry.”

Current requirement is for 8,000 Linux-based technical jobs. Unix is being replaced by Linux in a fast pace and most of todays devices run on a changed version of Linux kernel from servers, HDTV desktops to supercomputing data centres. Read more »

Ubuntu 11.04 Natty Narwhal with Unity UI

Ubuntu 1104 Natty NarwhalApril and October are the months where Canonical releases new versions of their OS Ubuntu. And that means it’s time for a new Ubuntu release now, with what may be a ground-breaking user interface and major changes from previous versions that come together nicely.

Ubuntu code named Natty Narwhal, or version 11.04 is here and sporting some radical changes from previous editions of the Linux distro. The most distinguished being the arrival of the Unity desktop environment, which was previously relegated to netbooks. It has integrated search, a combination of launcher and a taskbar, and app menus that have been moved to the top of the screen much like in Max OS X, effectively implementing the best ideas from Apple and Microsoft and a new design. Read more »

Setup Puppet to configure your network servers

Growing companies at some point are faced with the increased workload to setup, configure and maintain their servers and applications. Administrators try to script repetitive tasks and ultimately look for solutions that are scalable and provide a central management tool base. There are several software packages available, commercial and open source ones.

Puppet is probably the most used open source configuration management package available today and more system administrators and software developers are interested in setting it up within their environment. An excellent book about Puppet (Pulling Strings with Puppet) is available and so are numerous online articles and tutorials. However, lots of online resources are just not quite complete and can lead to lots of frustration, especially in the setup and configuration of Puppet.

So here is another step by step tutorial about how to install and setup Puppet to the point where we can run a simple recipe residing on the server (puppetmaster) and execute on the client. For this illustration we’ll install Puppet on Ubuntu 10.10 using a deb package.

Configure Network and DNS

Setting up configure hostnames on server and client is crucial. Since Puppet uses self signed certificates to secure communication, it’s essential that network is setup properly and hostnames are configured with fully qualified domain names.

Let’s open /etc/hosts and add the necessary entries. (note: If you use a DNS server in your network, those setting changes should be made on your DNS server and not the hosts file)

 Read more »

Install and configure puppet server (puppetmaster) on Ubuntu 10.10

Before installing and configuring puppet server (puppetmaster), ensure that your network is properly setup. Configure Puppet Server on Ubuntu 10.10 is easy and straight forward. It’s those subleties about the network configuration and necessary puppet recipes and files that can make our lives miserable.

To install Puppet, choose one of the following methods (we will use the Ubuntu Package)

Using package manager of your distro

  • RPM (Fedora) for Red Hat, Fedora (puppet-server for server, puppet for client)
  • DEB (Debian) for Ubuntu, Debian (puppetmaster for server, puppet for client)

Installing from source: (note: you will need to have Ruby installed on your system prior to installing Puppet)

  • download the latest version from puppetlabs
  • # tar -zxf puppet-0.xx.x.tgz
  • # cd puppet-0.xx.x
  • # ruby install.rb
  • # puppet –version (to verify installation)

Using Ruby Gem: (note: you will need to have Ruby and Ruby Gem installed on your system prior to installing Puppet)

# gem install –remote –source http://reductivelabs.com/downloads puppet

Read more »

Install and configure Puppet Client on Ubuntu 10.10

After we have configured our network and installed, configured and verified our Puppet Server (puppetmaster), it’s now time to install our first puppet client and configure it to receive a signed certificate and puppet recipes. If you haven’t performed those pre-requisite setups, please start with Setup Puppet to configure your servers.

Let’s first install puppet from the ubuntu package:

# apt-get install puppet

Then we start our client

# puppetd –server puppet-server01.example.com –verbose  –waitforcert 60

A peak at /var/log/syslog confirms our request for a certificate: Creating a new SSL certificate request for puppet-client01.example.com
And the same log on the server should contain: puppet-master[617]: puppet-client01.example.com has a waiting certificate request

If this state on the server is confirmed, it’s time to sign the certificate on the server:

# puppetca –list (and again we should see the hostname of our client that has requested the cert)

# puppetca –sign puppet-client01.example.com

We should get confirmation as such: notice: Signed certificate request for puppet-client01.nextpt.com. Anything else or errors will likely point towards network and/or dns configuration issues.

If you have followed our tutorial on how to setup puppetmaster, you should now have htop installed on your client. Also check /var/log/syslog for additional info.

Finally we should enable puppet to start on reboot. We do this by editing /etc/default/puppet and set START=yes.

Install Redmine using Passenger via Apache on Ubuntu 10.04

Installing Redmine on any system has been a daunting task for many, especially work thru countless dependencies and linking apps to make the application available via Apache. Since Ubuntu 10.04, Redmine can now be installed via apt or aptitude, and no doubt the process is much easier, but by no means just as straight forward as we’re used to.

To get Redmine up and running over Apache on Ubuntu 10.04, these basic steps are required:

  1. Install Apache2, Mysql Server, Subversion, extensions and utilities
  2. Install Redmine via apt
  3. Test Redmine using Webrick
  4. Install Passenger

1. Install Apache, Mysql Server and necessary extensions and utilities

$ sudo apt-get install build-essential apache2 apache2-threaded-dev apache2-suexec-common libapache2-svn libmysqlclient15-dev

2. Install and configure Redmine

$ sudo apt-get install redmine redmine-mysql subversion

Read more »

Ubuntu 10.10 Maverick Meerkat Said To Be Radical

Ubuntu LogoThe new anticipated release of Ubuntu 10.10,  named “Maverick Meerkat” (currently in alpha2) is said to be radical, according to Marc Shuttleworth, chief of Canonical.

Canonical head Mark Shuttleworth mentioned on his blog that the upcoming Ubuntu version 10.10 will be focused on being social and fast. Shuttleworth says “The OS is getting faster and faster when it comes to boot times but the final push remains”. In the mean time, he said that the Netbook Edition of Ubuntu 10.10 will have a revamped UI and will be the fastest booting, fastest network OS for netbooks at this time. Canonical is the company that finances and oversees the Ubuntu project.

Ubuntu 10.10 is being called “Maverick Meerkat”. Meerkats are social creatures by nature and very family oriented and therefore has been adopted for this release. The Ubuntu project has been working very hard to become a viable and open source alternative to leading operating systems such as Mac OS X and  Windows 7.

Ubuntu is probably the most installed Linux distro currently, thanks to many different flavors (Ubuntu, Kubuntu, Xubuntu, Edubuntu, Ubuntu Studio and Ubuntu Netbook Edition). These variations include desktop and server versions including applicable applications and default settings. The last one is for netbooks and started with the amalgamations of Intel’s Moblin (Mobile Linux) into Ubuntu.

Ubuntu 10.10 promises to make everything faster and better than ever before, but ultimately will depend on how good Canonical is at keeping promises. Ubuntu has become a strong competitor and real alternative, and that is especially true for netbooks. For the average consumer, power users and production systems, the benefits come in the form of low cost, good stability and increased security.

Learn more about Ubuntu and the upcoming release.

Create Patch Files Using Patch And Diff

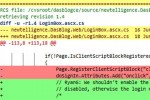
Using diff to create batch files and subsequently running them against select files is such a convenient way to update, fix or change existing files, but many developers and system administrators simply don’t know much about them.

Here is a quick primer on using diff and apply changes for select files. Use diff –help to check out more options and flags.

NOTE: pay caution when using patching, any mistake or error are executed without warning or undo feature. It’s best to always make a backup of any file or folder that are going to be affected by your patch.

diff

Some useful flags you can specify when comparing files are -b (ignore white space difference), -B (ignore blanc lines), -r (recursive) and -i (ignore case).

Let’s say we need to change the GA analytics code on our pages and that they are unfortunately hard coded. The files are shown below as are the results from diff: Read more »

How To Clean Up The New Ubuntu Grub2 Boot Menu

Clean Up And Modify he new Ubuntu Grub2 boot menu differs quite a bit from the previous version. As Ubuntu nominated the new version 2 of the Grub boot manager as of 9.10, removing of the old problematic menu.lst file.

Ubuntu Grub2 Boot Menu

Ubuntu Grub2 Boot Menu

Grub2 is a leap forward in many ways, and most of the annoyances from menu.lst are gone. Yet, if you don’t clean up old versions of kernel entries, the boot list can quickly get messy and end up in a long list of nonsense. Let’s assume we want to remove the 2.6.32-21-generic boot menu entries. Previously, this meant editing /boot/grub/menu.lst. But with Grub2, we use the package manager to remove the kernel package from our computer, Grub automatically removes those options. Btw. if only one operating system is installed on your computer, you may not see the boot menu at all and have to hold down the SHIFT button on your keyboard while booting up to get the menu to show.

To remove old kernel versions, open up Synaptic Package Manager, found in the System > Administration menu. When Synaptic opens up, type the kernel version that you want to remove into the Quick search text field. The first few numbers should suffice. Then for each of the entries associated with the outdated kernel (e.g. linux-headers-2.6.32-21 and linux-image-2.6.32-21-generic), right-click and choose “Mark for Complete Removal”, then hit “Apply”. These entries will be gone upon the next boot. Read more »